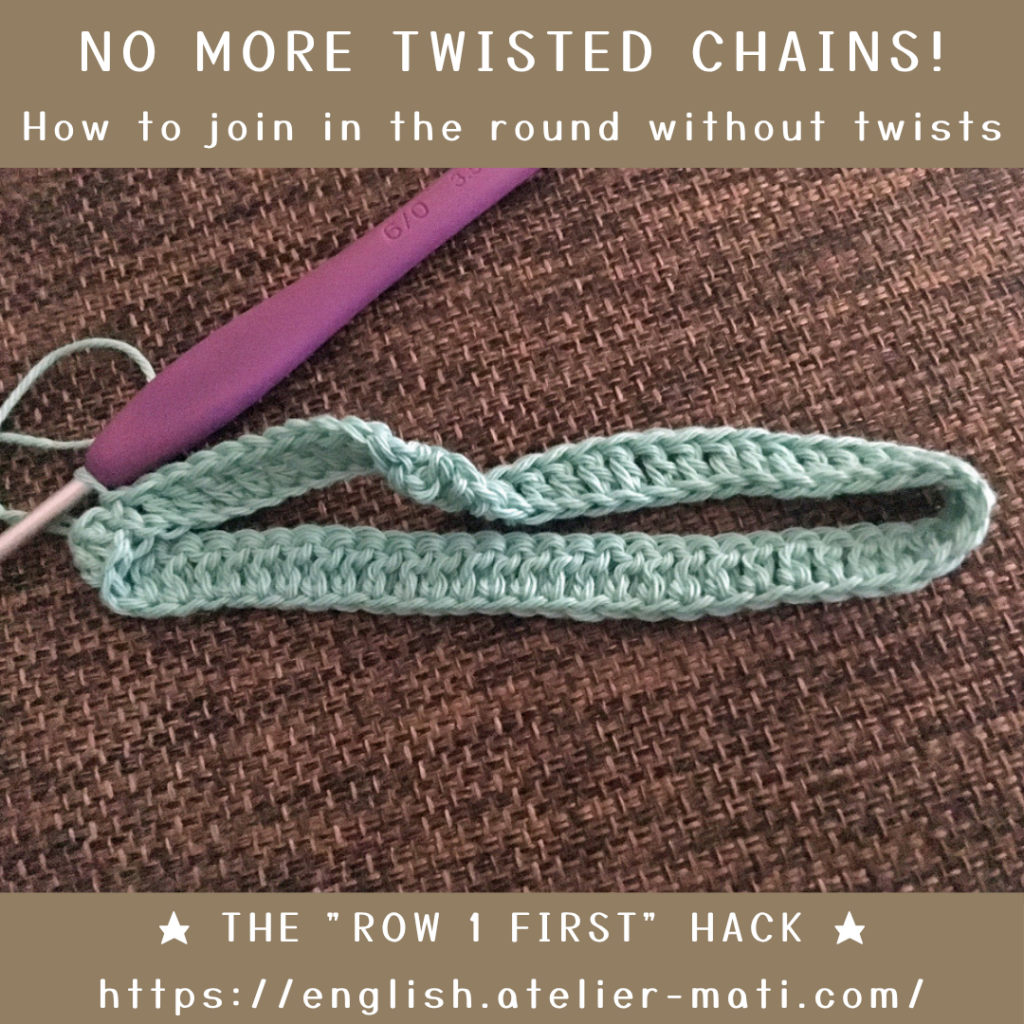
Have you ever found yourself struggling to insert your hook into that tiny, tight back bump of your starting chain, wondering, “Why does everyone make this look so effortless?”
Recently, I saw someone in the crochet community sharing how frustrated they were with working into the back bump. It often feels like so many video tutorials treat the back bump as the “gold standard” for starting a project.
But here’s the secret: there is no single right or wrong way to pick up stitches from your foundation chain.
You don’t always have to force your hook into the back bump. The best method depends entirely on the stitch pattern you’re working, how you plan to edge or seam the piece, and how you want the finished fabric to behave.
In this guide, we’ll break down the three common ways to work into your starting chain—and more importantly, how to choose the right one for your specific project!
Anatomy of a Crochet Foundation Chain
There are three primary ways to pick up stitches from your foundation chain.
Before we dive into each method, let’s quickly look at the anatomy of a crochet chain so you know exactly which parts we’re talking about!
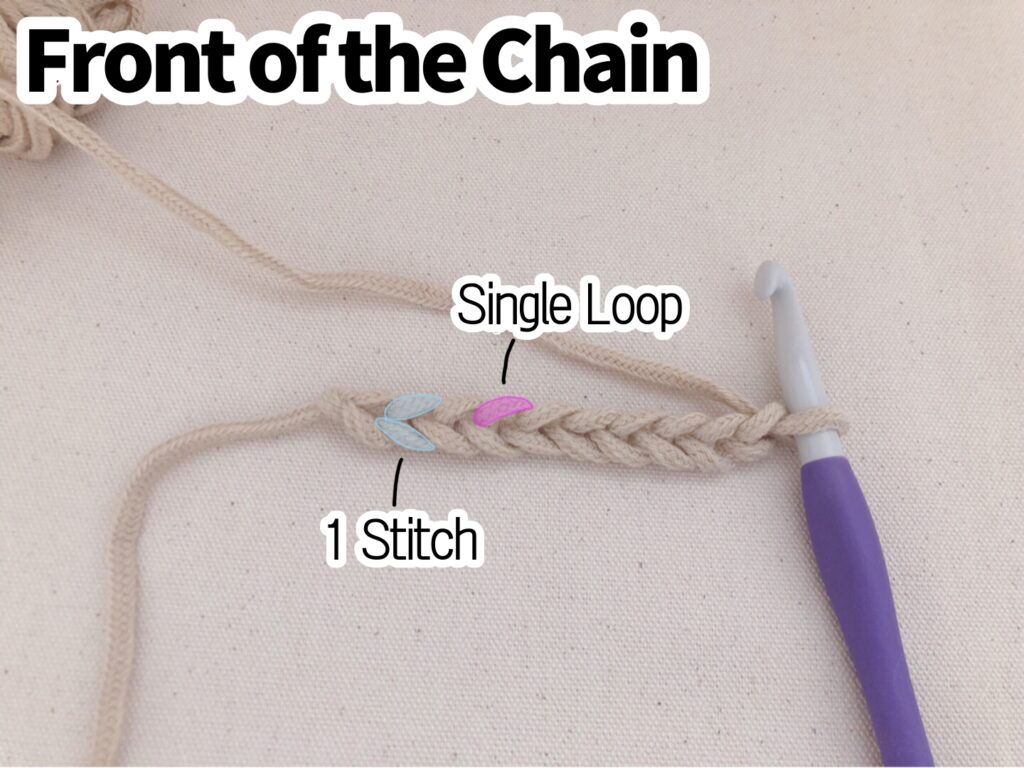
Here is the front side of the chain. Each “V” shape represents 1 stitch (1 chain), and each strand that forms the “V” is a single loop (the top and bottom loops).
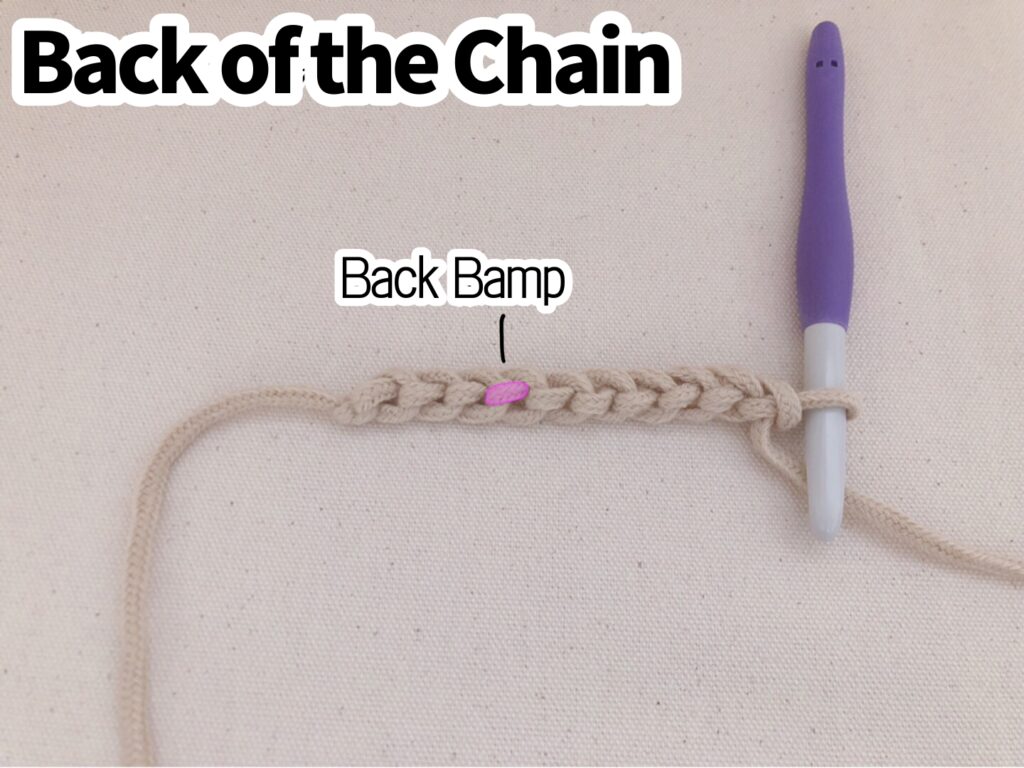
And here is the back side of the chain. When you flip it over, you’ll see a series of small, raised bumps running down the center—this is the back bump (sometimes called the back ridge or back loop).
The 3 Ways to Work into the Foundation Chain
Method 1: Working into the Back Bump
This is the most common method seen in modern video tutorials. You insert your hook into that small, raised bump running along the back of the chain.
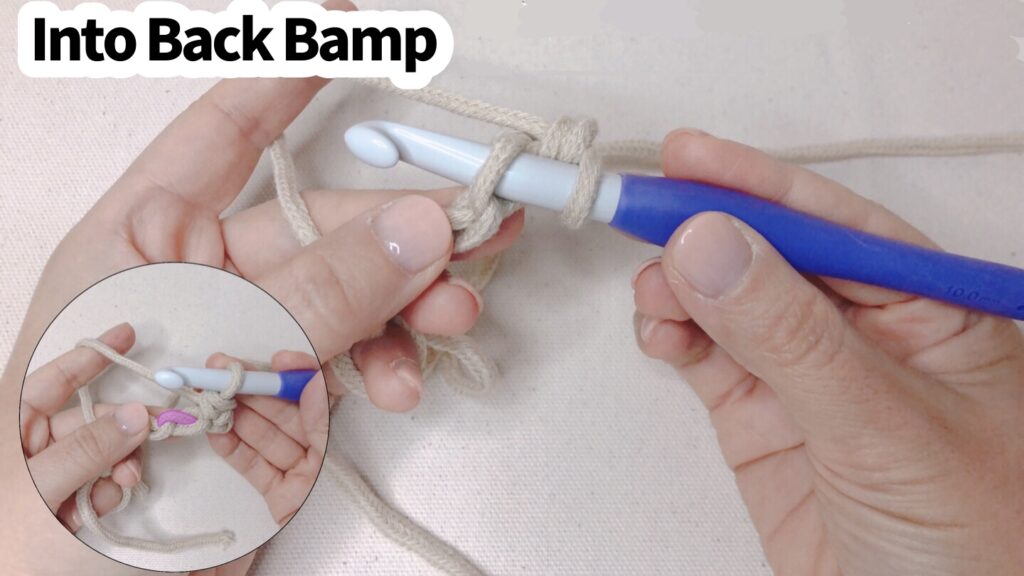
When to use this method:
- When you work into every single chain stitch across the row
- When the starting chain forms the final edge of your project
Tips for a flawless finish:
When you work into every back bump, the chain stitches naturally get pulled upward, causing the foundation row to shrink slightly in width. This can make the bottom edge curl, warp, or feel overly tight.
To prevent this:
- Try to keep your starting chain tension on the looser side.
- Pro Tip for beginners: Controlling your tension manually can be tricky. A great, stress-free trick is to use a crochet hook that is 1 to 2 sizes larger than the hook you plan to use for the main body. Once your foundation chain is complete, simply switch back to your project hook!
Method 2: Working into the Top Loop + Back Bump (Under 2 Loops)
In this method, you insert your hook under both the top loop and the back bump, catching two strands of yarn on your hook instead of just one. This technique is especially useful for openwork, lacy stitches, or shell patterns.
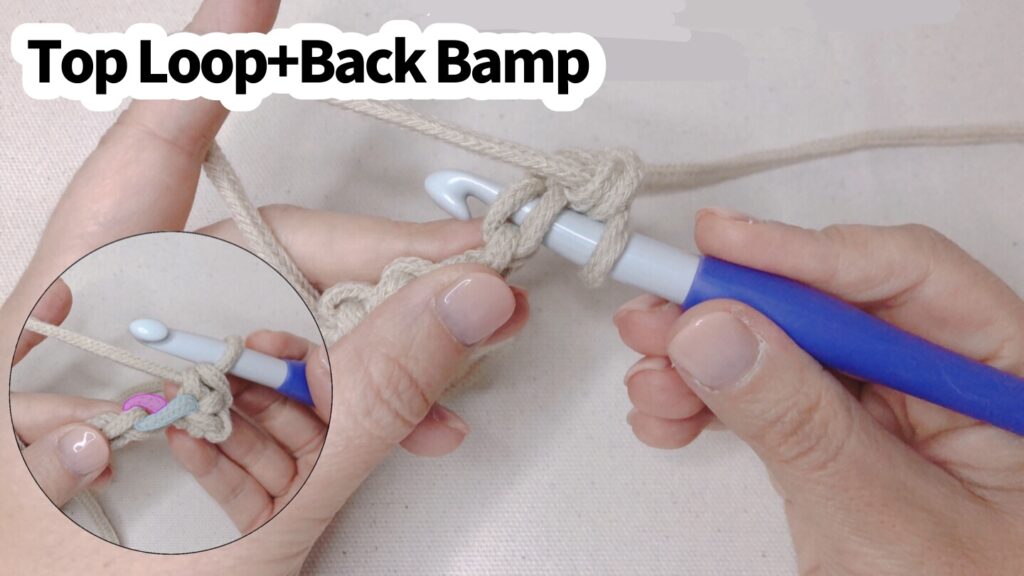
When to use this method:
- For open, lacy stitch patterns that skip multiple chains (such as mesh or trellis lace)
- When working multiple stitches into a single chain (such as shell stitches, fans, or clusters)
Why this method works (The Logic):
When you skip several chains across the foundation row (for example, ch 5, skip 3, sc in next ch), working into only a single loop or just the back bump can cause that stitch to be pulled upward by tension. This stretches the chain strand and leaves an unsightly, loose gaping hole along the foundation row.
While skipping just one chain is usually fine with the back bump, skipping multiple chains puts too much strain on a single strand.
By inserting your hook under both the top loop and the back bump (2 loops), the chain creates a sturdy, locked anchor. The stitch won’t stretch or deform, leaving your fabric stable and your starting edge looking clean and professional.
The same applies to shell stitches or clusters where you work 5 or more stitches into the exact same chain. Anchoring into two loops distributes the weight and pull, preventing that base chain from stretching open.
Method 3: Working into the Top Loop Only
This is probably the method you first learned when picking up a crochet hook! It is the most straightforward, beginner-friendly way to start because that single top loop is so easy to see and insert your hook into.
While many crocheters move away from this method as they advance (often because it can stretch or distort if used in the wrong place), it is actually an indispensable technique for certain specific designs.
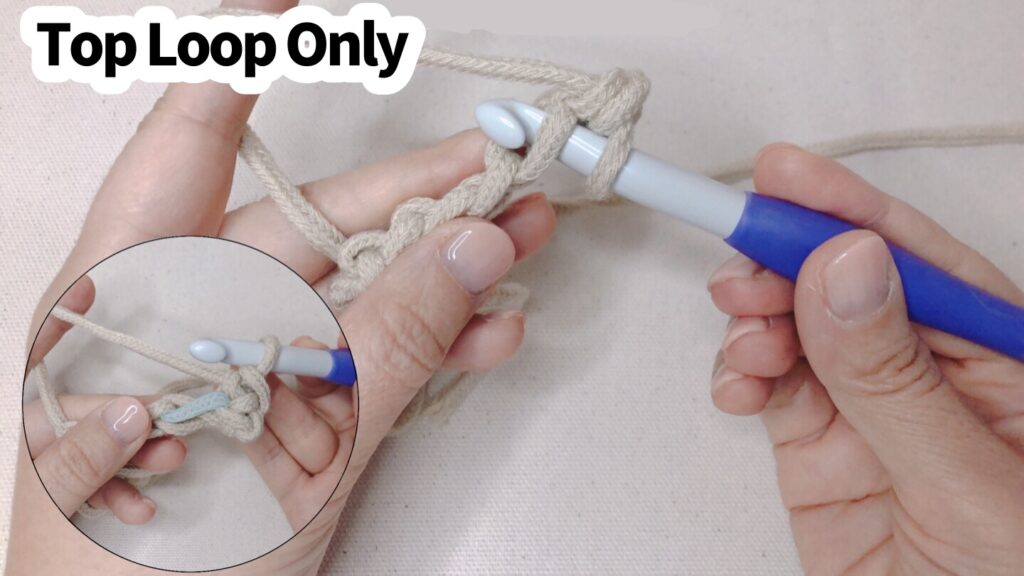
When to use this method:
- When you want a softer edge with a little more natural “give” (less rigid and constricting than working into the back bump)
- When crocheting in the round around a starting chain (such as oval soles for booties, bags, or amigurumi bases)
Why this method works (The Logic):
Because you are catching only a single strand of yarn, the foundation row doesn’t get pulled as tightly inward, leaving the bottom edge feeling softer and less stiff.
Even better, it makes working around a foundation chain seamless.
When making an oval base, you crochet down one side of the chain, and then rotate your work to crochet back along the opposite side:
- By working into only the top loop on your first pass, you leave the remaining bottom loop and the back bump perfectly intact on the other side.
- This gives you a clear, sturdy, and easy-to-see target when you work your way back along the underside, preventing confusing gaps, loose holes, and uneven stitches.
Which Method Should You Choose? (Quick Summary)
No single technique is universally “better” than the others—it all comes down to the stitch pattern and structural needs of your project. Here is a quick cheat sheet to keep handy:
| Insertion Point | Best Used For | Key Advantage |
| Back Bump | Working into every chain / Edges with no added border | Creates a clean, neat edge that looks like regular stitches |
| Top Loop + Back Bump (2 loops) | Openwork lace, mesh, shell stitches | Prevents holes from stretching; creates a sturdy base |
| Top Loop Only | Oval bases, projects needing a softer edge | Clear target when working both sides; gentle flexibility |
Final Thoughts: Crochet with Flexibility
The next time you start a new project and feel that familiar dread of fighting with tiny, tight back bumps, remember: you don’t have to force it.
There is no single rule that applies to every piece. Before you pick up your hook, take a quick look at the stitch structure you are about to work and how you want the finished edge to behave. Whether you need a crisp raw edge, a locked-in base for openwork, or a softer start with a little natural give, the right insertion point is simply the one that serves your design best.
Understanding why you choose a specific loop gives you the freedom to crochet comfortably and achieve a cleaner finish every time.
Which method do you find yourself using most often? Drop a comment below, or save this post on Pinterest for your next project cast-on!

Hi, I'm mati!
Crochet and knitwear designer based in Japan. I create relaxing, delicate patterns inspired by daily botanical aesthetics and traditional Japanese stitch techniques.