![[ATELIERmati] Crochet and Knitting](https://english.atelier-mati.com/wp-content/uploads/2026/10/cropped-03_PNG_white-1-362x131.png)
Beaded Shell Stitch Pouch: Vintage Romance & Subtle Shimmer
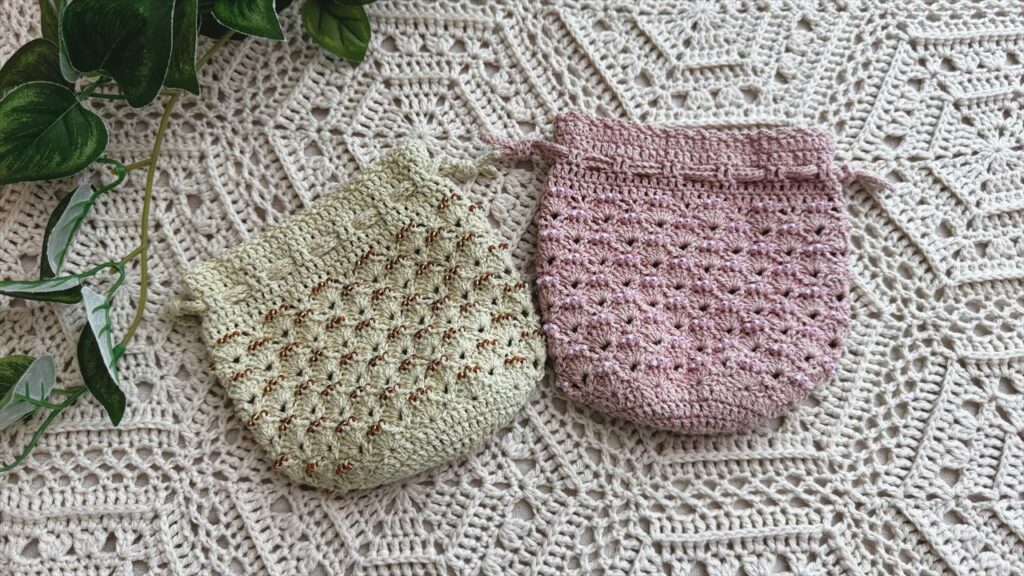
The Beaded Shell Stitch Pouch is an elegant, vintage-inspired drawstring pouch that beautifully harmonizes tactile crochet texture with the delicate sparkle of beadwork.
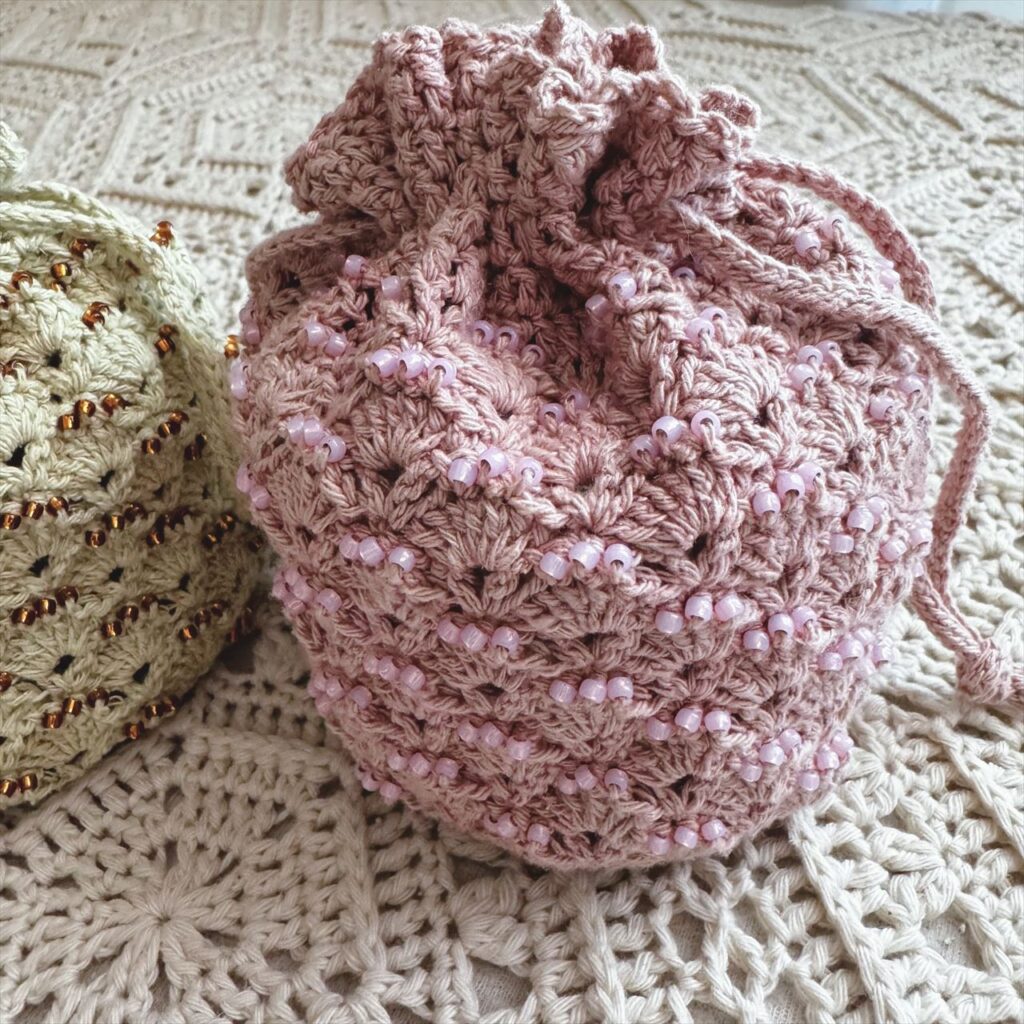
Worked in a plump, classic shell stitch, the fabric has a satisfying, structured drape accented by tiny glass seed beads (size 8/0) crocheted directly into the stitches. As the pouch moves, the beads catch the light with an understated, antique-like gleam—adding just the right touch of timeless sophistication.
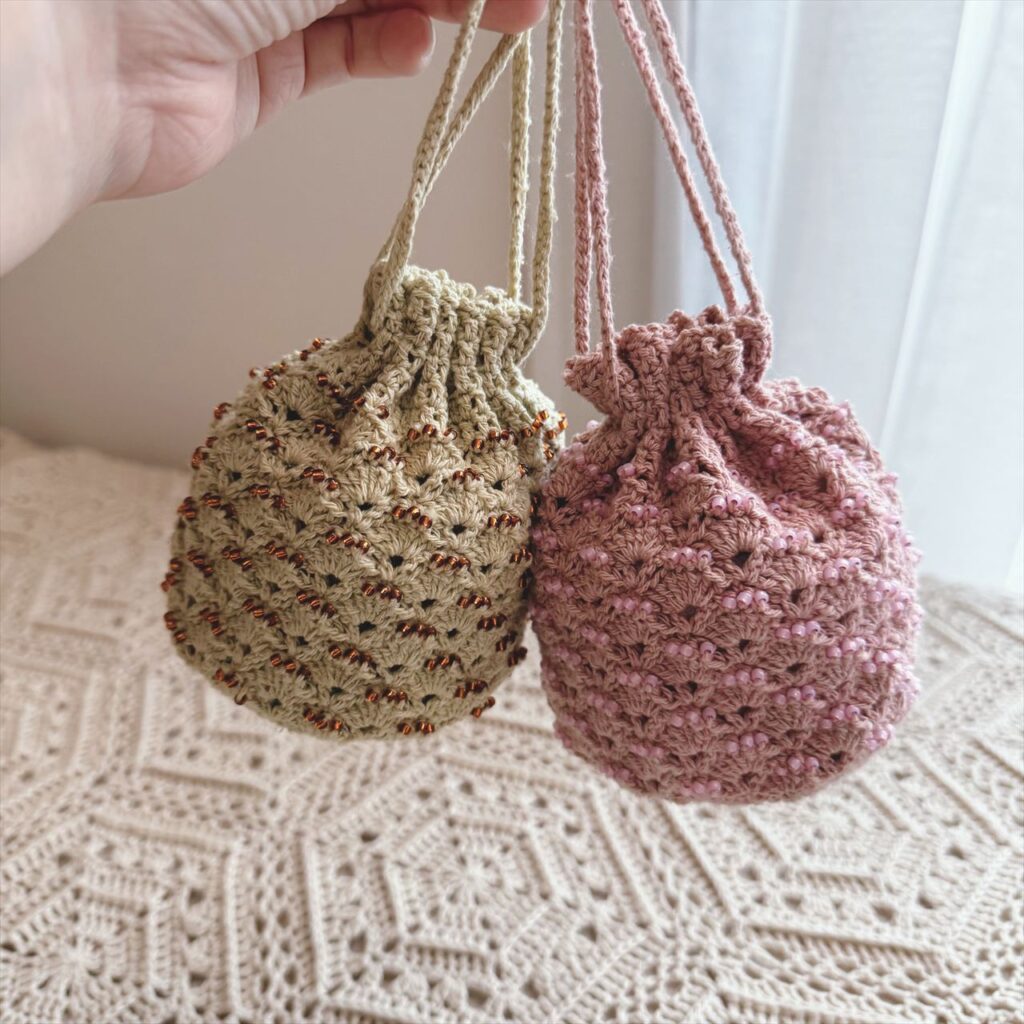
Photographed in naturally dyed spun silk in traditional Japanese botanical shades—the gentle autumn yellow-green of Ominaeshi (女郎花) and the soft spring blossom pink of Hitoe-ume (一重梅)—this piece is designed to age gracefully over time, deepening in character the more it is loved and carried. Measuring approximately 14 cm (5.5”) wide by 13 cm (5”) tall when laid flat, it is the perfect charming keepsake for jewelry, cosmetics, essential notions, or mindful gifting.
📥 Prefer an Ad-Free Printable PDF?
Download the complete, high-resolution PDF pattern (including the printable Japanese stitch chart) for free on Ravelry!
👉 Download Free on Ravelry & Add to Favorites
(Adding this pattern to your Ravelry favorites helps other makers discover it!)
Pattern Details & Materials
Pattern Specifications
- Yarn: Hand Dyed Spun Slik (100% bourette silk; approx. 560m / 100g)
- Yardage: Approx. 20g / 112m (122 yds)
- Hook: 2.5 mm (closest US size B/1 or C/2)
- Notions: 324 size 8/0 seed beads (plus a few extra for stringing)
- Finished Size: 14 cm / 5.5″ wide x 13 cm / 5″ tall (laid flat)
Gauge
- 25.5 sts and 15 rows = 10 cm / 4″ in double crochet (dc)
- 25.5 sts and 22.5 rows = 10 cm / 4″ in shell stitch
Abbreviations & Symbols (US Terms)
ch: chain
st(s): stitch(es)
sl st: slip stitch
sc: single crochet
dc: double crochet
sp: space
( ) in same st: work the instructions inside the parentheses into the same stitch or space.
Special Stitch
bsc : Insert hook in indicated stitch, yarn over, pull up a loop, slide a bead up to the work, yarn over, and pull through both loops on hook.
Pattern Notes
Pre-stringing beads: String all beads onto the working yarn before you begin crocheting. Since beads cannot be added once you start, it is highly recommended to string extra beads. This will save you from having to cut and rejoin the yarn if you miscount or run short.
Base and Edging: The base and the edging sections are worked without turning at the end of the round. The Right Side (RS) will always be facing you.
Shell Stitch Section: The shell stitch pattern section is worked by turning the work at the end of each round.
Bead Placement: When working a beaded stitch, the bead will naturally be pushed to the side facing away from you. Therefore, bead stitches are worked on Wrong Side (WS) rounds to ensure the beads appear on the Right Side (RS) of the finished piece.
Tips for stringing small beads:
If the holes of your beads are too small for a tapestry needle, try the following method to string them:
- Apply a generous amount of PVA craft glue to the end of the yarn.
- Let it dry completely until the yarn becomes stiff and hard.
- Cut the stiffened tip at an angle to create a sharp point.
- Use this stiffened end like a needle to easily string your beads onto the yarn.
Pattern Instructions
Base: Working with RS always facing.
Round 1 (RS): make a magic ring, ch 3 (counts as 1 dc), 11 dc in the ring, join with a sl st to the top of ch 3. (12 dc)
Round 2 (RS): ch 3 (counts as 1 dc), 1 dc in the same st, 2 dc in each dc around, join with a sl st to the top of ch 3. (24 dc)
Round 3 (RS): ch 3 (counts as 1 dc), 1 dc in the same st, 1 dc in the next dc, [ 2 dc in the next dc, 1 dc in the next dc ] 11 times, join with a sl st to the top of ch 3. (36 dc)
Round 4 (RS): ch 3 (counts as 1 dc), 2 dc in the next dc, 1 dc in the next dc, [ 1 dc in the next dc, 2 dc in the next dc, 1 dc in the next dc ] 11 times, join with a sl st to the top of ch 3. (48 dc)
Round 5 (RS): ch 3 (counts as 1 dc), 1 dc in the same st, 1 dc in each of the next 3 dc, [ 2 dc in the next dc, 1 dc in each of the next 3 dc ] 11 times, join with a sl st to the top of ch 3. (60 dc)
Round 6 (RS): ch 3 (counts as 1 dc), 1 dc in the next dc, 2 dc in the next dc, 1 dc in each of the next 2 dc, [ 1 dc in each of the next 2 dc, 2 dc in the next dc, 1 dc in each of the next 2 dc ] 11 times, join with a sl st to the top of ch 3. (72 dc)
Shell stitch section
Working by turning the work at the end of each round.
Round 1 (RS): ch 1 (does not count as 1 sc), 1 sc in the same s, skip 2 dc, 7 dc in the next dc, skip 2 dc, [ 1 sc in the next dc, skip 2 dc, 7 dc in the next dc, skip 2 dc ] around, join with a sl st to the first sc, turn. (12 shells)
Round 2 (WS): ch 4 (counts as 1 dc and ch 1), skip 2 dc, 1 bsc in each of the next 3 dc, [ ch 1, skip 2 dc, ( 1 dc, ch 1, 1 dc ) in the next sc, ch 1, skip 2 dc, 1 bsc in each of the next 3 dc ] 11 times, ch 1, skip 2 dc, 1 dc in the same s as the beginning ch-4, join with 1 sc to the 3rd ch of the beginning ch-4, turn.
Round 3 (RS): ch 3 (counts as 1 dc), 3 dc in the same sp, skip next dc, ch-1 sp and bsc, 1 sc in the next bsc, [ skip next bsc, ch-1 sp and dc, 7 dc in the next ch-1 sp, skip next dc, ch-1 sp and bsc, 1 sc in the next bsc ] 11 times, skip next bsc, ch-1 sp and dc, 3 dc in the same sp as the beginning ch-3, join with a sl st to the top of ch 3, turn.
Round 4 (WS): ch 1 (does not count as 1 sc), 1 bsc in the same st, 1 bsc in the next dc, ch 1, skip 2 dc, ( 1 dc, ch 1, 1 dc ) in the next sc, ch 1, [ skip 2 dc, 1 bsc in each of the next 3 dc, ch 1, skip 2 dc, ( 1 dc, ch 1, 1 dc ) in the next sc, ch 1 ] 11 times, skip 2 dc, 1 bsc in the next dc, join with a sl st to the first bsc, turn.
Round 5 (RS): ch 1 (does not count as 1 sc), 1 sc in the same st, skip next bsc, ch-1 sp and dc, 7 dc in the next ch-1 sp, [ skip next dc, ch-1 sp and bsc, 1 sc in the next bsc, skip next bsc, ch-1 sp and dc, 7 dc in the next ch-1 sp ] 11 times, skip next dc, ch-1 sp and bsc, join with a sl st to the first sc, turn.
Round 6 (WS): ch 4 (counts as 1 dc and ch 1), skip 2 dc, 1 bsc in each of the next 3 dc, [ ch 1, skip 2 dc, ( 1 dc, ch 1, 1 dc ) in the next sc, ch 1, skip 2 dc, 1 bsc in each of the next 3 dc ] 11 times, ch 1, skip 2 dc, 1 dc in the same st as the beginning ch-4, join with 1 sc to the 3rd ch of the beginning ch-4,
Rounds 7-18: repeat Rounds 3-6.
Edging Working with RS always facing.
Round 1 (RS): ch 3 (counts as 1 dc), 1 dc in the next dc, skip next ch-1 space, 1 dc in each of the next 3 bsc, [ skip next ch-1 space, 1 dc in the next dc, 1 dc in the next ch-1 space, 1 dc in the next dc, skip next ch-1 space, 1 dc in each of the next 3 bsc ] around, skip next ch-1 sp, 1 dc in next dc, join with a sl st to the top of ch 3. (72 dc)
Round 2 (RS): ch 3 (counts as 1 dc), 1 dc in each st around, join with a sl st to the top of ch 3. (72 dc)
Round 3 (RS): ch 3 (counts as 1 dc), 1 dc in the next dc, ch 1, [ skip next dc, 1 dc in each of the next 2 dc, ch 1, skip next dc ] around, skip next dc, join with a sl st to the top of ch 3. (24 ch-1 spaces)
Round 4 (RS): ch 3 (counts as 1 dc), 1 dc in the next dc, 1 dc in the next ch-1 sp, [ 1 dc in each of the next 2 dc, 1 dc in the next ch-1 sp ] around, join with a sl st to the top of ch 3. (72 dc)
Round 5 (RS): ch 3 (counts as 1 dc), 1 dc in each st around, join with a sl st to the top of ch 3. (72 dc)
Round 6 (RS): [ ch 3, skip next st, 1 sl st in the next st; repeat ] around, join with a sl st to the base of the first ch-3, fasten off.
Drawstrings (Make 2)
Row 1: ch 126, sl st in the 2nd ch from the hook, sl st in each ch across.
Finishing
Fasten off and weave in all ends. Thread the two drawstrings through the ch-1 spaces of Round 3 of the Edging from opposite directions, weaving over and under the stitches.
🧶 Need the Visual Stitch Chart?
Prefer working from traditional Japanese crochet diagrams? The complete, high-resolution visual stitch chart is available exclusively in the free printable PDF on Ravelry!
👉 Download Free Pattern & Japanese Chart on Ravelry
(If you enjoyed this pattern, adding it to your Ravelry favorites helps more makers find it!)
Share Your Makes!
Did you make the Daisy Coaster? I would love to see your color choices and finished pieces!
- Link your finished project on Ravelry
- Share your photos on Instagram and tag @atelier_mati
Happy crocheting, and see you in the next pattern!

Hi, I'm mati!
Crochet and knitwear designer based in Japan. I create relaxing, delicate patterns inspired by daily botanical aesthetics and traditional Japanese stitch techniques.