![[ATELIERmati] Crochet and Knitting](https://english.atelier-mati.com/wp-content/uploads/2026/10/cropped-03_PNG_white-1-362x131.png)
Is joining a starting chain into a ring your least favorite part of crochet? If so, you are definitely not alone.
A short chain isn’t too bad, but when a project calls for a long, curling foundation chain, trying to keep every single stitch flat and untwisted feels almost impossible.
You carefully smooth it out with your fingers, join with a slip stitch, and finish working your entire first round—only to realize it twisted into a Mobius strip somewhere along the way. Having to rip out all that hard work right at the beginning is so frustrating that it can completely kill your motivation to crochet!
If you have ever felt defeated by a twisted starting chain, here is the good news: there is a stress-free technique I always use in my own designs to eliminate this problem completely.
Instead of wrestling with a flimsy, curling chain, you simply crochet Row 1 flat first before joining into the round.
In this tutorial, I’ll show you how this simple “Row 1 First” method works step-by-step. Once you try it, you will never join a bare chain again!
Why Does a Foundation Chain Twist in the First Place?
A bare foundation chain is narrow, lightweight, and naturally prone to spiraling. When you have dozens (or hundreds) of tiny loops, even a microscopic flip along the length is almost invisible until you work stitches into it.
By working Row 1 flat first, you add weight, width, and clear stitch definition. Once you have a solid row of stitches, it is practically impossible to twist the strip without noticing!
Step 1: Work Your Starting Chain and Row 1 Completely Flat
Start by chaining the number of stitches required for your project.
Even if your pattern or chart instructs you to join the chain into a ring right away, do not join it yet. Simply work Row 1 completely flat across the chain, just as you would when working flat rows (like a scarf or blanket).
(Pro Tip: Leave your starting yarn tail a bit longer than usual—about 6–8 inches (15–20 cm). We will use this tail at the end to seamlessly close the tiny slit at the bottom!)
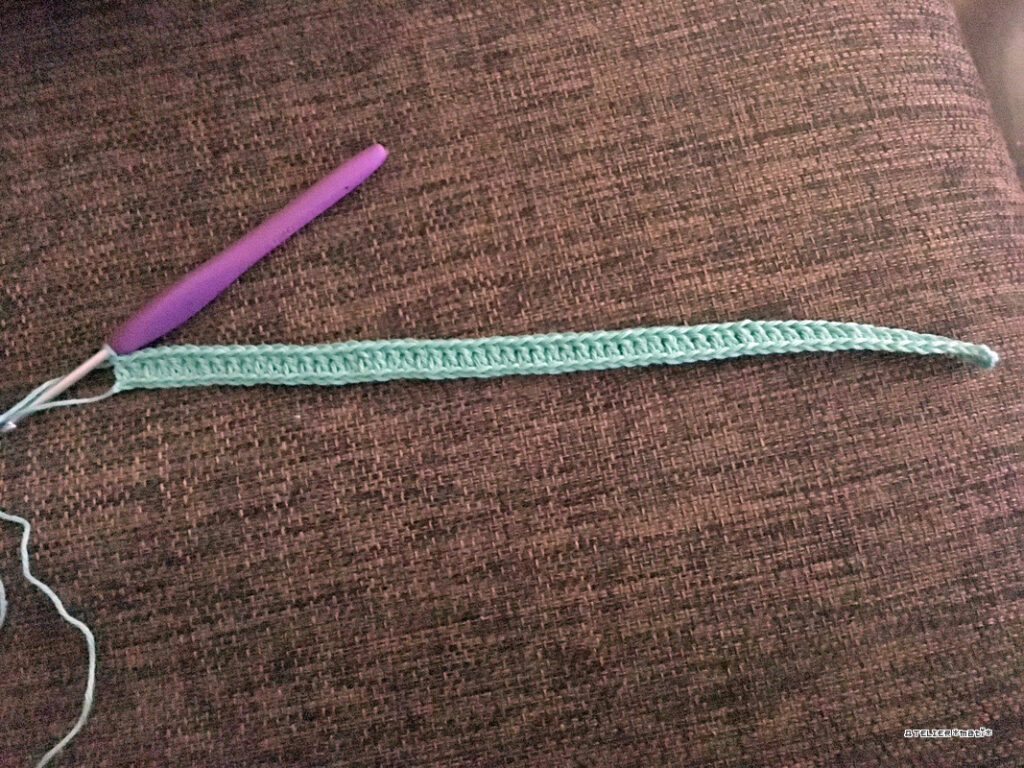
Step 2: Join Row 1 into a Ring with a Slip Stitch
Once you finish crocheting your first flat row, lay your work on a table and gently smooth it out with your fingers.
Because your piece now has the height and weight of actual stitches (rather than a skinny, curling thread), it is practically impossible to twist without noticing. Make sure the entire row is lying flat with the right side facing you.
Now, bring both ends together to form a ring. Insert your hook into the top of the very first stitch (or the top of the beginning turning chain) of Row 1, and work a slip stitch (sl st) to join.
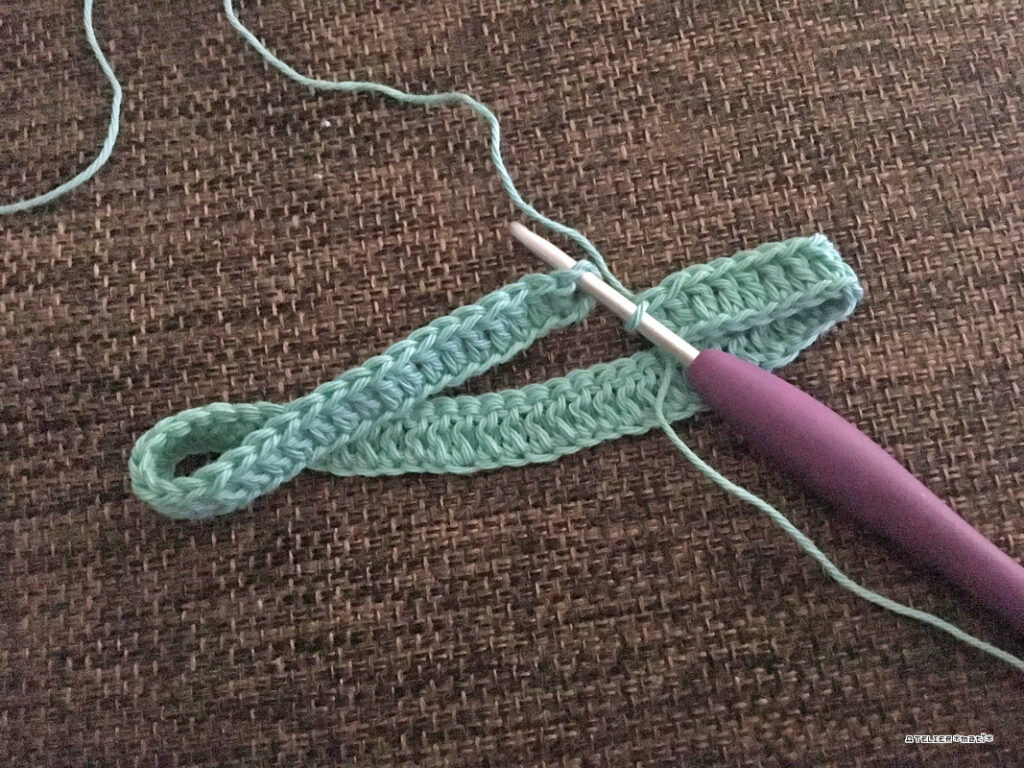
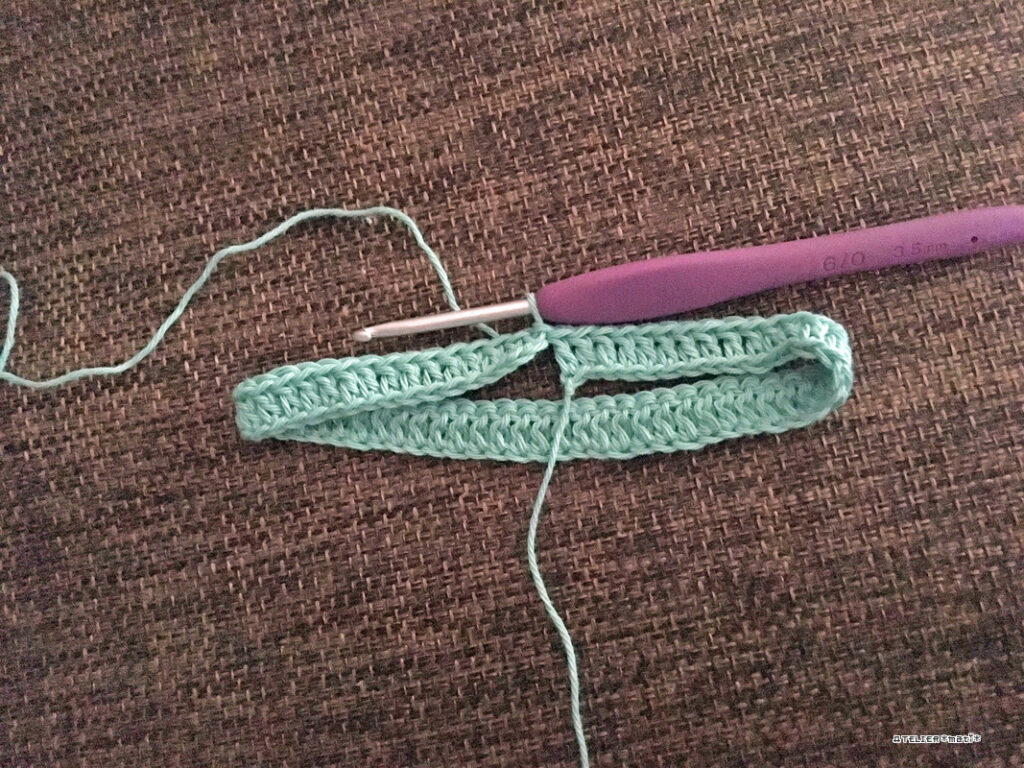
Step 3: Crochet the Rest of Your Project Normally!
Just like that, your project is officially joined in the round!
At this stage, you will notice a tiny split at the very bottom where the starting chain began. Don’t worry about that at all for now—the rest of your ring is completely secure, and we will close that tiny gap cleanly at the very end.
From here, simply continue following your pattern or chart as written:
- Chain your turning chain, work your stitches around, and join each round.
- You can now crochet with total peace of mind, knowing your foundation is 100% straight and will never twist on you!
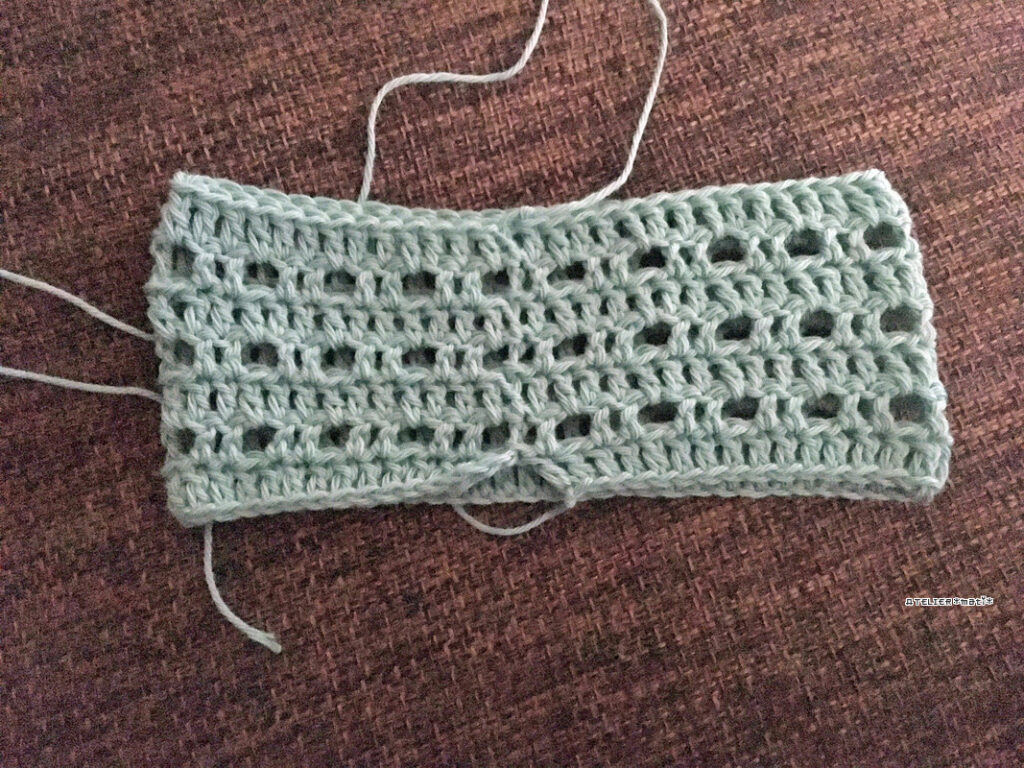
Step 4: Seamlessly Close the Bottom Gap
Once you have finished crocheting your piece (or when you are ready to weave in your ends), take a look at the bottom edge where you started. You will see that small open slit between the first and last chains.
Here is how to make it disappear completely:
- Thread your starting yarn tail onto a tapestry needle (yarn needle).
- Insert the needle into the base of the very first stitch (right at the bottom corner of the opposite side).
- Pull the yarn gently until the two bottom edges align neatly.
- Weave the remaining tail securely through the wrong side of your stitches and trim the excess yarn.
That’s it! The small gap closes seamlessly, leaving a clean, continuous edge that looks identical to a traditional starting ring—with none of the frustration or twisted stitches.
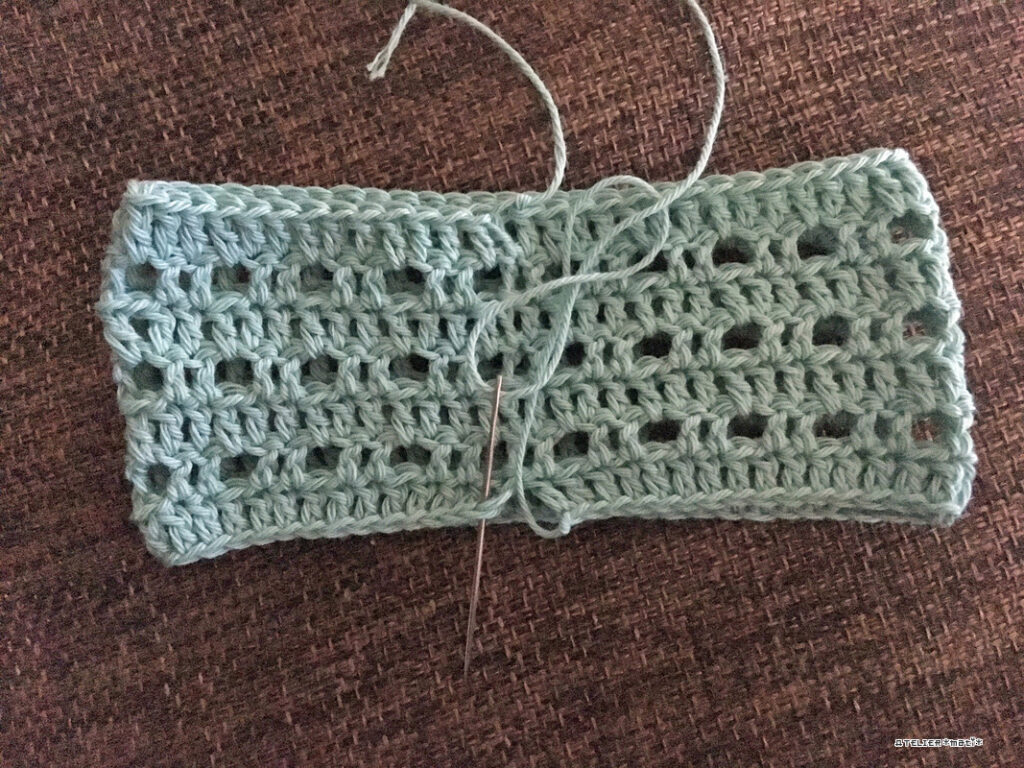
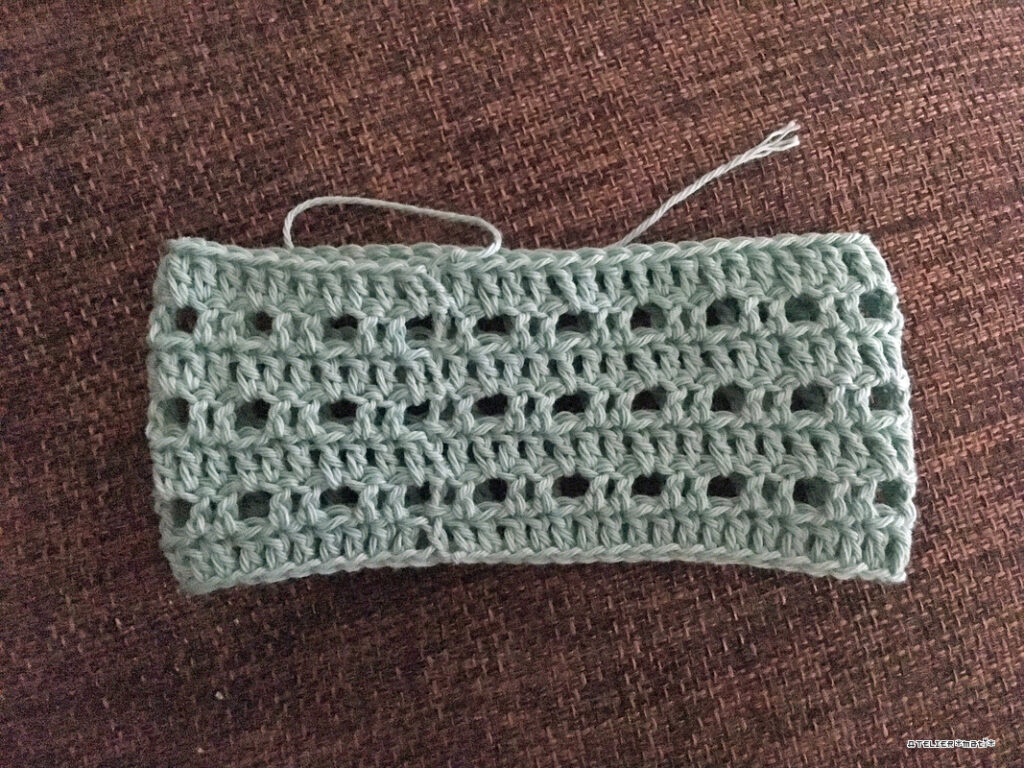
A Flawless Finish with Zero Frustration
You might be wondering: “Does joining after Row 1 change how the finished project looks?”
The answer is not at all!
Once that tiny bottom slit is sewn closed with your yarn tail, there is virtually no visible difference between a piece joined after Row 1 and one joined directly from the starting chain. In fact, if your pattern adds a ribbing or an edging into the foundation chain later, it is practically impossible for anyone to tell the difference!
A bare, skinny chain loves to twist and spiral, turning what should be a fun start into a stressful battle. But with just a single row of stitches worked flat, keeping your fabric straight becomes completely effortless.
Starting in the round from a long chain is a very common technique in crochet books and patterns everywhere. The next time you find yourself wrestling with a curling chain, I hope you’ll remember this little trick!
👉Did you find this hack helpful?
Save this post to your Crochet Tips board on Pinterest so you always have it handy for your next project, or share it with a crochet friend who struggles with twisted chains!
Happy crocheting!

Hi, I'm mati!
Crochet and knitwear designer based in Japan. I create relaxing, delicate patterns inspired by daily botanical aesthetics and traditional Japanese stitch techniques.